
Introduction
Wood structures like timber decks and verandahs face harsh and constantly changing environments. Humidity, rainwater, and sunlight are the environmental factors that affect your deck floors. Deck and Verandah floor sanding is an essential part of home maintenance.
Timber decking is a popular choice for the outdoor living areas of Brisbane homes. Brisbane’s weather allows you to have comfy outdoor dining and solace, enjoying a cup of tea or having a small family gathering on your back deck. On the other hand, maintaining your timber deck is mandatory for all these activities. We recommend an annual coating to keep your timber deck shiny and resilient whilst keeping away any excessive treatment procedures.

Timber Deck coated with Sikkens Deck
When do you need Timber Deck Sanding in Brisbane?
Your timber deck/verandah may need sanding and recoating if it starts to show any of the following signs of deterioration.
Deck Coating Starts to Peel
Deck coatings usually start to peel due to spillage or severe weather conditions. Unattended verandahs and closed homes are most likely to face such type of damage. Sanding a surface with a floor sander and polishing it is promising to give back the beautiful look of a timber deck and verandah.
The Timber Decking Boards Start to Turn Gray
Exposure to the sun’s UV rays causes photochemical degradation of wood, resulting in a change in the physical appearance of wood from natural brown to gray color. The effect can be reversed by opting for bleaching, scrubbing, pressure washing, or, depending on the extent of change, with time.
Nails Start to Protrude Out of the Wooden Boards
The popping out of the nail from the wooden surface sometime after it has been originally based is due to the shrinkage of the wooden fibers around the nails, causing its protrusion. Hammering it or cutting it with a multi-purpose tool, followed by sanding timber decks, is the most appropriate procedure to get rid of such a situation.
Timber Deck and Verandah Restoration Process
The purpose of timber decks and verandahs is multi-fold. It adds beauty and value to your home and is also a place for a family congregation. To maintain and extend the life of decks, it is important to take good care of them by following some simple steps that we undertake while providing our services.
Choosing the Right Sander
The three types of sanders are drum, orbital, and edge sanders. Usually, the decks and verandahs in Brisbane are jarrahs, spotted gum, and merbau. These woods are sturdy, durable, and challenging to sand. Choosing the right equipment for sanding saves time and brings the best results.
Sanding Grit Progression
At the beginning of the sanding process, the orbital or drum sander is fixed with a coarse grit sandpaper (around 40-60 grit) to remove the hard-to-remove old finish and weathered timber. Coarser grits and sandpapers remove material from the worn-out floors faster, but can leave scratches on the floor. Switch the sandpaper progressively to a finer grit (up to 120) for a smoother finish. You can have a more polished and smoother surface with fine-grit sandpaper.
Sanding Technique
For edges or areas that are hard to reach, a handheld orbital sander or sanding block is recommended for achieving a smooth surface. To prevent scratches, always sand in the direction of the wood grain. Maintain a consistent motion with the sander to avoid damaging the timber.
Dust Collection
Wear a proper uniform to avoid dust getting into your eyes or bruising your hands. Equipment with a dust collection system( an orbital sander with a dust bag attached) prevents dust accumulation in the room or nearby furniture and household items.
Damages Inspection
The first and foremost process before carrying out any treatment is to inspect the damage being done to the deck due to humidity, weather, UV rays, or any other cause. Our team carefully surveys the area and does the proper homework before starting the next step.
Cleaning
Followed by the detection of damages, the next step is cleaning the area with pressure machines and specialized equipment. The best cleaner for this procedure is Sikkens Cetol BL deck and wood cleaner. If the deck has been previously painted, then we opt for paint removal procedures first.
Sanding
The most important step in deck sanding in Brisbane is using tools that even out rough surfaces, removing all kinds of impurities, and making it smooth and suitable for finishing treatments.
Polishing and Finishing
The last step is the polishing of the timber deck with decking oils. Above all, the products used for this purpose, or recommended ones, are Sikkens products, which are applied as follows:
- Sikkens Cetol HLSE is applied, which comes in different colors, providing a beautiful finish. It is microporous, so it allows the timber to breathe, and it also provides resistance to extreme weather conditions and UV rays exposure on sunny days.
- Sikkens Cetol deck is applied afterward as two coats. It is transparent and oil-based and provides additional protection and finishing.
After all these steps, your beautiful deck and verandah are ready after 2 days of drying time. For maintaining your homes, it is necessary to have an annual follow-up to keep them in good condition.
Tools and Equipment Needed for Timber Deck and Verandah Sanding
The right tools for sanding make the sanding faster and give a professional finish. The right equipment is necessary to sand the deck or verandah in an organized manner. Here’s a breakdown of the requisite sanding equipment
Hand Tools
- Sanding Block: For sanding hard-to-reach areas, minor imperfections, and corners.
- Hammer or Screwdriver: Fix loose nails and screws using a handheld hammer
Sandpaper
- Coarse Grit (40-60): At the start of the sanding, remove the top layer of old finish.
- Medium Grit (80-100): To smooth the surface after rough sanding.
- Fine Grit (120-150): For the final sanding, create a smooth finish.
Safety Gear
- Dust Mask: There is a special mask for the sander to protect him from dust. The dust from sanding contains harmful particles that can cause diseases if inhaled. A dust mask is essential to protect your lungs from fine wood particles.
- Safety Goggles: Safety goggles are an essential part of self-protection while sanding. They protect your eyes from dust and debris.
- Ear Protectors: These protect your ears from loud noise from Power sanders that can damage your hearing.
Sanding Machines
- Drum Sander: It is Ideal for large, flat areas of decking. It removes the old timber layer quickly and exposes fresh timber beneath.
- Belt Sander: A belt sander is used for sanding large deck areas. It is known for its efficiency but requires professional handling.
- Edge Sander: Sand areas near walls, edges, or corners that are hard to reach with large sanders.
- Random Orbital Sander: For large flat areas to remove coarse, worn-out timber from the surface. It requires careful handling by a professional to avoid timber damage.
Cleaning Supplies
- Vacuum or Broom: To clean and collect dust before and during the sanding process.
- Rags and Brushes: For applying finishing oils, stains, or sealants evenly on the floor.
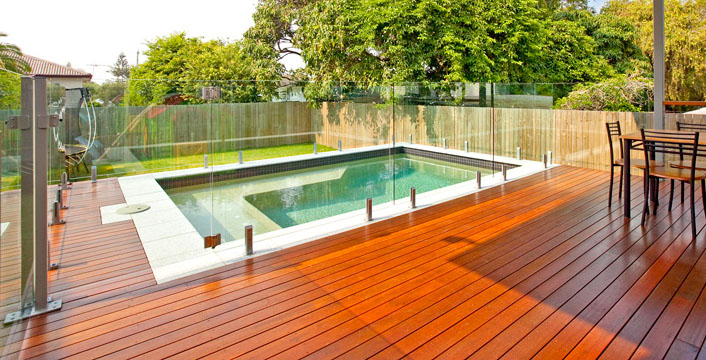
Sanding of Outdoor Decks around Pools
Pool decking is a growing trend in Brisbane homes. It offers a spot for family gatherings and a beautiful leisure time. It is crucial to maintain the poolside decks to preserve their aesthetics and value. Pool decks are subject to high moisture content due to water splashing from the pool, wet clothes, and feet.
Maintenance of the pool deck through sanding
Outdoor pool decks require high maintenance due to high moisture content, UV exposure, and high foot traffic. Regular cleaning with a dry cloth is necessary to prevent water penetration. Sanding removes the top weathered layer of the pool deck, and finishing with oil or sealant preserves the aesthetic appeal and beauty of the outdoor leisure spot.
Benefits of sanding your deck
Enhanced aesthetics
Sanding uplifts the natural beauty of the timber by removing the dust and imperfect veneer, revealing a beautiful layer underneath. A freshly sanded and polished deck floor gives good vibes and gives the appearance of a newly installed floor.
Uniform surface
Dents, splinters, and scratches make the surface rough and hard to walk. Sanding evens out rough patches and imperfections, creating a smoother, safer surface for walking.
Better penetration of the finish
The rough and uneven surface does not take the stain well. You will observe unevenly stained floors. Sanding the floor smoothes the surface and opens the wood grains, allowing oils, stains, or sealants to penetrate more evenly and effectively.
Enhanced safety and Durability
Sanding timber decks and verandahs is essential for durability and perseverance. Unattended floors expose homes to mold growth, pest infestation, and weather damage. It ensures safety by eliminating uneven surfaces, reducing the risk of tripping or injury on a worn-out deck.
Boosts Property Value
A clean and well-maintained deck adds overall appeal and value to your property.
Easy Maintenance
A sanded floor can be easily maintained and cleaned. It prepares the floor to absorb the finish that protects it from external damage.
Timber Deck and Verandah Sanding for Brisbane Homeowners: DIY vs. Hiring Professionals
Many homeowners in Brisbane and its suburbs find it convenient to sand their decks and verandahs on their own using DIY techniques. But it is essential to weigh the pros and cons before deciding whether to do the job yourself or hire a professional.
Sanding the floor using DIY techniques
Pros:
- Affordable: Sanding your deck yourself is economical, and you can plan according to your budget.
- Time Flexibility: You can streamline the project according to your schedule.
- Self-achievement: Many homeowners find satisfaction in completing home improvement projects. The feeling of achieving the goal is rewarding for such people.
Cons
- Tools demand: Sanding equipment is expensive, and you cannot tell whether the equipment is right for sanding. The equipment is utilized occasionally, and there is a chance that it will rust over time.
- Time-Consuming: Sanding a deck yourself can be tiring and laborious if the condition of the timber is worse.
- Wrong techniques: Incorrect sanding techniques ( sanding against the grain pattern/ uneven sanding) can damage the timber and are costly to repair. Handling a sanding machine is strenuous and can only be operated correctly by a professional.
Professional floor sanding
Pros:
- Experience: Professional sanders have years of experience in deck floor sanding and polishing. They have the expertise to handle different equipment and can ensure a smooth and even finish.
- Warrantied results: Budget Floor Sanding professional floor sanding company, ensures guaranteed output after having a clear conversation with the homeowner, providing peace of mind.
- Work efficiency: Access to and experience in handling industrial-grade equipment allows them to complete the job quickly and efficiently.
Cons:
- Project Cost: Hiring professionals can be more expensive than a DIY approach.
Less Flexibility: The professional team will complete the project on time. You’ll need to schedule the project according to the contractor’s availability. - Hiring a professional is more convenient and feasible when the damage is extensive and the homeowner has no experience and knowledge about sanding. An inexperienced person should not try sanding the verandahs. Experienced sanders in Brisbane understand the local climate and the treatment procedures for timber floors.
The Best Time for Deck Sanding in Brisbane
The climate of an area plays a significant role in determining the best time to sand the deck floors. Here are some seasonal considerations to keep in mind:
Summer
The summer season is considered a suitable time to sand the floors. In reality, summer heat can affect the wood in terms of changes in moisture content. It is advisable to complete the project early in the morning or choose a day with lower humidity levels.
Autumn
Autumn is a moderate time of the year to sand your floors. The sanded deck in autumn will fight the cool winter breeze and moisture. Dry, clear days in autumn allow for optimal conditions for sanding.
Winter
Winter is not suitable for sanding the floors as the wood shrinks in the cold season. The sanding will not be proper and smooth. If you need to sand in winter, choose a bright sunny day and complete the project in the daytime.
Spring
Spring is the best season to sand the timber floors as winter has passed and summer is yet to arrive. The refreshing and mild weather is ideal for flooring work.
Common Mistakes to Avoid in Timber Deck and Verandah Sanding
As simple as it sounds, people often make common mistakes while sanding the floors, especially in DIY projects. Here’s how to avoid them:
Skipping Grits
The right way to sand the floor is to start with coarse-grit sandpaper and progress towards fine-grit. Using a finer grit at the start to skip the steps and achieve the results faster can result in scratches and dents on your timber floors.
Sanding Wet Timber
Cleaning the floor is an essential step before sanding. Wet floorboards are not favorable for sanding. Sanding wet floors can cause the wood fibers to tear, leading to an uneven surface. Ensure the timber is completely dry before starting the sanding process.
Sanding Against the Grain
Access the direction of the grain before starting the sanding process. Always sand in the direction of the wood grain to avoid unsightly scratches that are difficult to remove.
Not Preparing Properly
Secure loose nails or remove them before starting the sanding process. Nails and screws can damage the sander and the floorboard.
Conclusion
Timber decks and verandahs are a beautiful investment in many Brisbane homes. They uplift the beauty and resale value of your homes. Regular care and maintenance keep the shape of the verandah and are essential for its longevity. Understanding the sanding process, choosing the right equipment, and using the services of the right professional ensure the best results for your timber.
Importance of Timber Deck and Verandah Sanding
Climate change and neglect for a long time have had adverse effects on timber flooring. Timber deck floor maintenance is required to maintain durability and endurance. Here are some reasons to sand your floors regularly:
Physical appearance
Timber floors are prone to being affected by external environmental factors and internal changes in the wood. External factors like sunlight, rain, and humidity distort the floor’s appearance and fade its beauty. Sanding the timber floors keeps the alluring beauty and luster by removing dirt, dust, and mold buildup. A maintained deck is aesthetically pleasing and increases the home’s resale value.
Preparation for staining or oiling
Sanding prepares the floor for treatments like staining and oiling. A sanded floor stains well and protects the floorboards from termite infestation, water damage, and mold attack. An uneven floor does not take the stain well and results in uneven stain patches that are unpleasant and repulsive.
Ensuring safety
Cracking of the floorboards and formation of splinters and protruding nails are common issues observed in floors in old Brisbane homes. These floors are not safe for families with kids and pets as they walk barefoot and can get bruises. Floor sanding evens out the surface and removes splinters that can result in potential injuries.
Enhanced longevity
The longevity of timber floors depends on the care and maintenance they receive. An annually sanded floor shows persistence in appearance and durability. Sanding removes the damaged top layer of the floor and reveals fresh timber.
When do you need Timber Deck Sanding in Brisbane?
Maintenance and longevity of decks and verandahs depend upon the knowledge of the time and the conditions when sanding is necessary. Here are the key signs and situations when timber deck sanding is needed:
Exterior Damage
Constant foot traffic, furniture dragging, and spills destroy the wood veneer in several ways. The surface can show one or all of the following signs:
- Dents and scratches: Dents and scratches result from furniture dragging, heavy foot traffic, and pets. Sanding the floor evens out such a surface and exposes the smooth surface underneath.
- Splinters and uneven surface: Water-damaged deck timber shows cupping and buckling at various points. Water penetration can cause cracks and softening of the wood, making it difficult to walk on. Sanding smooths the surface, preventing splinters and enhancing safety.
Moisture Damage
Decks and Verandahs face the changes in the external environment. Rainwater can accumulate and seep through the floorboard, causing floor swelling. Differentiating levels of humidity damage the timber floorboards in terms of the following:
- Rotting of the wood: Water penetration inside the timber floorboards causes the grains to swell. Signs of wood rot and decay are visible when the floor is not maintained well.
- Mold and Mildew Growth: Fungus and mold grow well in damp places. Moist wood serves as a habitat for mildew growth and pests. They appear as black or green patches on the timber floor. Sanding the floor, followed by protecting coat application, eliminates mold growth.
Insufficient Maintenance
Untreated decks and verandah floors are prone to damage and infestation. You can avoid or delay the sanding, but a stage comes when it is unavoidable. Sanding and polishing neglected floors is more expensive and time-consuming than ones taken care of regularly.
- Sand annually: to keep the deck floors shiny and irresistible, sand the floors annually with a professional floor sanding company.
- After extreme weather: Long summers and rainy days damage the timber floors of decks and verandahs. Inspect your decks after severe weather for damage, and consider sanding if required.
Before Staining or Recoating
Sanding is essential before re-staining or recoating your floor. The unsanded floor does not take the finish well and leaves patches. Applying the finish on a sanded floor ensures uniform absorption and long-lasting protection to the floor surface.
Frequently Asked Questions About Decks And Verandah Floor Sanding In Brisbane
How do I tell if my timber deck and verandah floors need sanding?
There are several key indicators to determine if your timber deck and verandah floors need sanding. Here are the signs to watch for:
- Faded or discolored timber due to sunlight exposure.
- Peeling or flaking finish as the coating gets older.
- Rough or uneven surface with visible wear and tear
- The lack of water resistance on the surface indicates the top coat has worn off.
- Mold, mildew, or rotting floorboards due to moisture accumulation.
- The deck feels slippery for many reasons, such as infestation, worn-out coating, and debris accumulation.
Why is timber deck sanding necessary in Brisbane?
Timber deck sanding is necessary in Brisbane to maintain the condition and appearance of your outdoor living area. The weather conditions and regular use can cause wear and tear, and sanding helps restore the beauty and resilience of the timber deck.
How do I know when my timber deck needs sanding and recoating?
Signs that your timber deck may need sanding and recoating include peeling of the deck coating, the decking boards turning gray due to UV exposure, and nails protruding out of the wooden boards. These are indicators that it’s time to consider sanding and refinishing.
What causes the peeling of deck coatings, and how can sanding help?
Deck coatings can peel due to spillage or severe weather conditions. Sanding the surface with a floor sander and polishing it helps remove the damaged coating and restore the beautiful look of the timber deck and verandah.
Why do timber decking boards turn gray, and can sanding reverse this effect?
Exposure to the sun’s UV rays causes photochemical degradation of wood, resulting in a change in the color of the timber decking boards from natural brown to gray. Sanding can help reverse this effect, depending on the extent of the color change.
What causes nails to protrude from wooden boards, and how can it be addressed?
Nails may start to protrude from the wooden surface due to the shrinkage of the wood fibers around the nails. Hammering or cutting the protruding nails followed by sanding the timber deck is the appropriate procedure to address this issue.
What is involved in the timber deck and verandah restoration process?
The restoration process includes damage inspection, thorough cleaning using specialized equipment, sanding to even out rough surfaces and remove impurities, and finally, polishing and finishing the timber deck with recommended products such as Sikkens Cetol HLSE and Sikkens Cetol deck.
How does cleaning contribute to the restoration process of timber decks and verandahs?
Cleaning the timber deck using pressure machines and specialized equipment helps remove dirt, grime, and previous coatings. This step prepares the surface for sanding and ensures optimal results during the restoration process.
What are the benefits of sanding the timber deck during restoration?
Sanding the timber deck is a crucial step that smoothens rough surfaces, removes imperfections, and prepares the deck for finishing treatments. It helps achieve a polished and rejuvenated look while enhancing the overall durability of the deck.
What are the recommended products for polishing and finishing timber decks?
Sikkens Cetol HLSE is recommended for its beautiful finish, breathability, and resistance to weather conditions and UV rays. Additionally, Sikkens Cetol deck, a transparent and oil-based product, provides added protection and a final finishing touch.
How often should I follow up with maintenance after sanding and polishing my timber deck?
To keep your timber deck in good condition, it is recommended to have an annual follow-up. This helps maintain the deck’s appearance, prolong its lifespan, and address any potential issues before they escalate.
Should I hire a professional to sand my deck, or can I sand it myself?
If you have the proper tools, knowledge, and time-You can sand your deck or verandah yourself. If you are inexperienced, DIY sanding can be risky. Diy sanding is useful for small to medium-sized decks. However, for larger decks or complex verandahs, it’s advisable to hire a professional.
What type of sanders are required for deck sanding?
For sanding the deck or verandah, you will need:
- Handheld Sander or Sandpaper: For sanding edges, corners, and tight areas.
- Random Orbital Sander: For finishing and smoothing.
- Edge Sander: To sand edges, railings, and corners.
- Drum Sander: For large, flat areas of the deck.
Use appropriate grit sandpaper for sanding. Ensure the machines are in good condition,
What grit sandpaper should I use for sanding my deck or verandah?
There are three types of sandpapers for sanding.
- Coarse-grit sandpaper (40-60 grit)- to remove the coarse damaged top layer.
- Medium grit (80-100) -to smooth and even the surface.
- Fine grit (120) -to give a final sanding to the floor to make it ready for polishing or staining.
Can we sand wet timber?
It is not advisable to sand wet timber. Sanding wet timber floors can cause splintering and uneven surfaces. Dry the floor completely before starting the sanding process. Make sure the deck is completely dry before sanding.
What is the best season of the year to sand my deck or verandah in Brisbane?
The best time to sand your decks is the spring and autumn seasons when the temperature is moderate and the weather is dry. High temperatures and humidity in summer can affect the drying time of oils and sealants. Similarly, during the rainy season, moisture can disrupt the sanding process and cause issues with finishes.
How long does it take to sand a deck or verandah?
The time duration to sand a deck or verandah depends on certain factors, such as:
- The type of sander.
- The condition of the timber.
- The size of the deck or verandah
- Number of team members.
A professional can complete the job in a short duration as they have specialized equipment and the necessary tools for sanding.
What is the cost to sand a deck or verandah in Brisbane?
The estimate of the cost of sanding a deck depends on the size of the deck, timber floor condition, and the person doing the sanding. If you are hiring a professional, the company will charge $30 to $60 per square meter. DIY sanding may cost between $200-$500 for equipment rental and materials.
Is it necessary to sand the deck before re-staining or oiling it?
Yes, sanding your deck before staining or oiling is essential for uniform penetration of the finish into the wood. Sanding removes the debris and mold from the floor and makes the surface smooth.
Skipping the sanding process can lead to uneven color, poor adhesion of the stain or oil, and reduced protection from weather elements.
How can I protect my deck or verandah floors after sanding?
Apply a high-quality stain, oil, or sealant after sanding to protect your deck from harsh weather. Additional tips for deck maintenance are:
- Regular cleaning: Clean the deck floor daily with a broom to prevent debris accumulation.
- Apply treatments periodically: Reapply oil or stain every 12-18 months to keep the timber protected.
- Use furniture pads: Prevent scratches by placing protective felt pads under outdoor furniture.
Can sanding remove all stains and repair floor damage?
Floor treatment options are not limited to floor sanding. While sanding removes most surface stains, including dirt, mildew, watermarks, and even minor scratches or gouges, deeper damage, such as rot or extensive warping, may require replacing the affected timber rather than just sanding. Consult a professional to assess the extent of the repairs needed if you notice significant structural damage.
How can I remove mold or mildew from my deck or verandah before sanding?
It is crucial to clean the deck surface thoroughly before sanding. Use a deck cleaner or a mild bleach solution to remove the mold. Scrub the affected areas with a stiff brush and rinse with water. Mold spores can spread to other places and make colonies. Clean and properly dispose of the removed mildew. Allow the deck to dry completely before sanding.
What types of wood are commonly used for decks in Brisbane? Do they affect the sanding process?
Spotted gum, Merbau, jarrah, and blackbutt are common hardwoods used for building decks in Brisbane. They are famous due to their durability in the subtropical climate. Different woods may require slightly different sanding techniques. Hardwoods require powerful sanders and coarse grit sandpaper to sand. Softwood floors need gentle sanding to avoid damage.
What are the safety precautions that should be taken before the sanding process?
Dirt and wood particles generated during the sanding process are harmful if inhaled. Ensure you follow these safety precautions:
- Wear a protective uniform: Cover yourself with protective gear. Use a dust mask. Long closed shoes, safety glasses, and ear protection.
- Inspect the sanding equipment: Regularly inspect equipment for safe operation, and avoid using tools with faulty parts.
Can I use a pressure washer before sanding my deck?
Yes, using a pressure washer before sanding is a great idea. It will remove dirt between the floorboards and any mold growth. However, ensure the deck is dried completely before sanding.
Can sanding fill the cracks in the timber?
Sanding can even out your floors and remove minor imperfections. To fill the gaps or cracks within the floorboards, use sealants and fillers that are specific for each type of floor and are easily available in the market. severaly damaged floorboards need to be replaced.